Showing posts with label HTML. Show all posts

Monday, January 18, 2010

pyBloggerU now has a GUI

Yesterday I sat myself in front of both Qt 4 Designer and Wing IDE and didn't tear myself away from my computer until I finished a GUI for pyBloggerU.

For those who didn't read my original post on the matter, pyBloggerU is a script I made that will upload an html file containing your Blogger post and images to your Blogger account for online publication. The script deals with the weirdnesses inherent in how Blogger mangles the HTML code so that what you see in your HTML editor is not what you get on Blogger.

Unfortunately it still is not programmed to handle HTML files generated from WYSIWYG editors, as they create too many complications for me to be able to handle with this script. But I've found that creating blog posts in an HTML editor called Quanta Plus to be easy enough. Quanta Plus has lots of buttons that shoot out HTML code for you, code and tag completion, and even a Visual preview mode if you're interested.

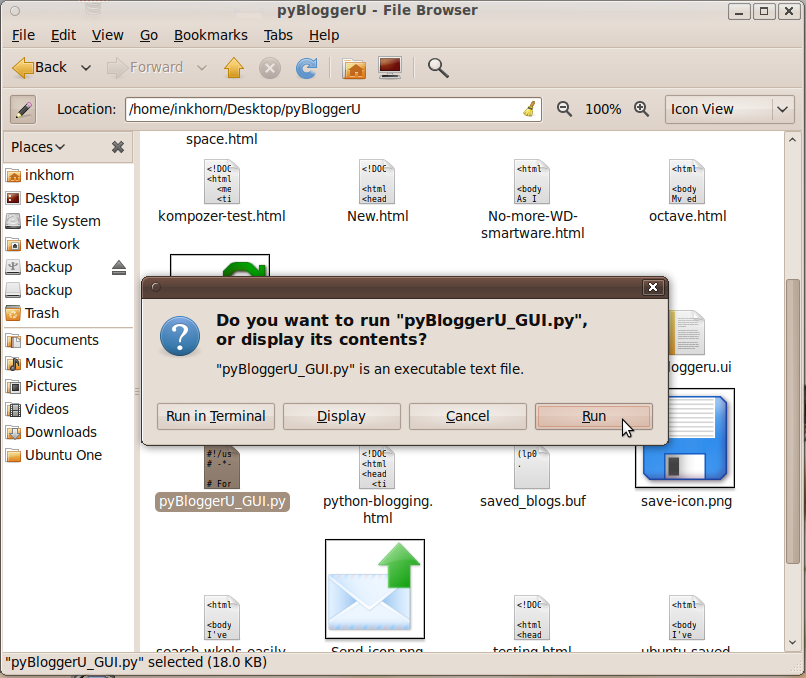
Once you've created your blog post in an HTML editor, like Quanta Plus, you just double click on the pyBloggerU_GUI.py file, press Run at the next window and enter in all the details shown in the picture below:


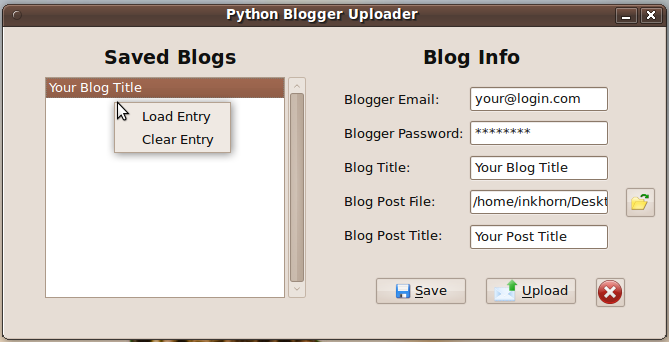
Be sure that any images referred to in the HTML contain their full file paths (the one above is "/home/inkhorn/Pictures/pyBloggerU.png") so that pyBloggerU will be able to upload them from your computer to your Blog's picasa web album. When everything is set, you can press the Upload button and your HTML file will become your blog post! When pyBloggerU succeeds at sending a blog post, you'll see a "Success" information window pop up a few moments after pressing the Upload button. Also, you'll be able to save your Blogger account info by pressing Save after filling out all the fields. When you have a new post to upload to blogger, you can then double click on the entry in the list to the left and your email, password, and blog title will appear in the fields to the right.

If you would like to download pyBloggerU, it's easily acccessible as a Bazaar branch on Launchpad. Even if you don't know what a Bazaar branch on Launchpad is, go to your terminal, and type in bzr branch lp:pybloggeru. This will create a directory called pybloggeru in your home directory and will store the python files for the program and all of its dependencies therein.

Of course if you would like to report a bug, ask a question, or contribute to the program, use the web utilities on the official pyBloggerU launchpad page.

Sunday, January 3, 2010

Tis a Gift to be Simple

Today I got interested in trying out a few different blogging sites (wordpress.com and tumblr.com) to see if either one of them provided a better/easier interface to work with than blogger. Going on Wordpress, I saw an interface that was both sophisticated and nice looking. Wordpress seemed to have everything.

Unfortunately there were a few drawbacks:
  1. Wordpress seems to intentionally set the width of your "Content Column" (the column within which your blog post appears) to be too narrow for my liking. Resultantly, the bigger pictures that I post appear to be cut off :(
  2. After investigating possible solutions to my first problem, I found out that I would need to pay a fee to customize the width (along with other features) of my blog to my liking. I don't like that at all.
  3. Even if I was to live with the narrow width thing, I am surprised that Wordpress doesn't automatically size your pictures according to the width of your content column.
Oh well, I probably won't be switching to wordpress! As for tumblr, I found their registration to be super easy, but the exact method to customizing your blog using CSS eludes me. I admit I know nothing about CSS, so tumblr may still be an option to investigate further.

Until then, "tis a gift to be simple". Thanks Blogger!

Friday, January 1, 2010

Blog from your HTML Editor and Python

So this is a test of the Python script I made to upload a custom made HTML file to my blog. As I mentioned in my last post, Google has provided its own Python Client Library to the public for connecting to Google's various services. What really confused me at first was the question of where exactly Google stores the pictures you want on your blog when you use the regular Blogger New Post interface. I soon discovered that if you're not linking to a picture that's on another website, any picture you put on your Blogger Blog is actually stored under a Picasa Web Album named after your blog and accessible by your Blogger account username and password. Knowing this, I just had to follow a few simple steps for using the Python Client Library to automatically upload pictures to the user's Picasa Web album (see here).

What I figured out is that if you want to put pictures on your blog post, you don't need to know where they'll be uploaded to. Just link to the pictures on your local hard drive and submit your HTML blog post file to my script. My script then:
  • looks for any local image links
  • uploads those files to your Picasa Web Album
  • gets the URLs of your newly uploaded images
  • Uses those URLs to replace the local path links in your HTML file, and finally
  • Uploads your newly modified HTML file to Blogger!

Also, I noticed that Blogger ignores the header/footer html tags found in all web pages like <html>, </html>, <head>, </head>, <body>, and </body> but retains the newline codes that follow them all. Finally, when Blogger processes <br> tags that are followed by a newline code, it creates two new lines. To fix this using my script, I made it so that the inputted HTML file gets sliced from the end of the first <body> tag to just before the beginning of the </body> tag. As well, it gets rid of all <br> tags, leaving only newline codes in their places. At the moment it's a command line script that I haven't yet tested on Windows. If you'd like to take a stab at using it, download it here. To make life easy, download it to the directory where you're saving your HTML blog post file and just call it from the command line by running python pyBloggerU.py. The program will ask you for the following pieces of information:
  1. The email address associated with your Blogger account
  2. Your Blogger account password
  3. Your Blog title (case insensitive), and finally
  4. Your Blog post title

If you'd like to help me out, I've registered my project in launchpad and you can submit a branch of my code. Go here
if you want to donate your time to help me out :).

And now finally, it's time for me to test out media uploading: